Classroom Supplies for Teachers suggested by pysanky expert Joan Brander
|
Pysanky expert and instructor Joan Brander says:
I often get inquiries from teachers asking what they should order when they want to conduct their own pysanky workshop in the classroom.
With over 35 years experience teaching in schools, I'm happy to share my knowledge and expertise and have done so in my free Pysanky Online Teacher
Guide and YouTube / Facebook Video Learn to Write Pysanky the traditional way for Teachers, Parents and Students..
The three specialty items you'll need are:
- beeswax (see more below)
- kistka (see more below)
- pysanky dyes (see more below)
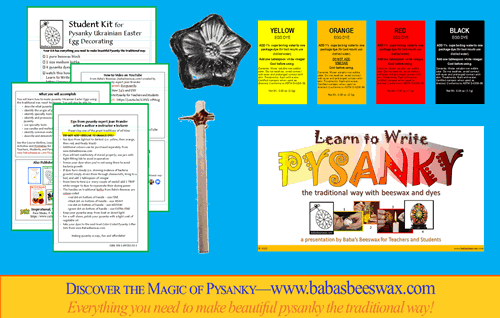
Everything you need in the Student Kit! These and other items can be easily collected from home or school or purchased from Baba's Beeswax.
 Download a printer-friendly Student Handout for Pysanky, with information on how the pysanka
was made, how to protect and display it, and a practice page for designs and symbols suitable for use as a student handout.
Download a printer-friendly Student Handout for Pysanky, with information on how the pysanka
was made, how to protect and display it, and a practice page for designs and symbols suitable for use as a student handout.
Student Groups
I recommend working in groups. I find that 5 or 6 students per group is manageable.
Entire School
Making pysanky in the classroom is easy, fun and affordable. Supplies can be easily shared and re-used. Doing so reduces the bottom line — cost per person. The trick is to
figure out how. Let me show you.
On this Page
|
|
 Basic Supplies Basic Supplies
|
 Beeswax
- Pysanky are made with pure beeswax. I recommend using coloured beeswax which is easy to see on the egg. One block makes at least a dozen pysanky of a basic design. These
can easily be shared. Beeswax
- Pysanky are made with pure beeswax. I recommend using coloured beeswax which is easy to see on the egg. One block makes at least a dozen pysanky of a basic design. These
can easily be shared. |
| |
|
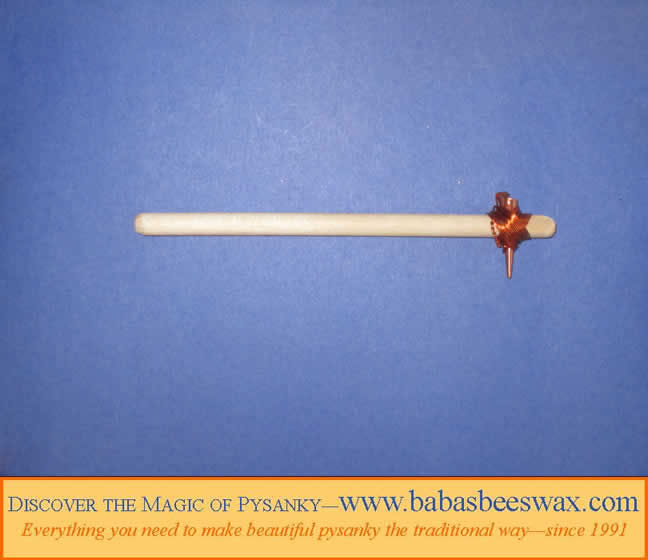
 Kistka
- I recommend using the traditional wood-handled kistka. Plastic (also known as delrin) handles can melt, rendering the kistka unusable. For beginners, use size MEDIUM
for everyone. This avoids competition amongst students. These are not easily shared. Have one kistka per person. For variety and/or those with fine motor skills or who are very
detail-oriented, get 1 or 2 different sizes for people to try out: Kistka
- I recommend using the traditional wood-handled kistka. Plastic (also known as delrin) handles can melt, rendering the kistka unusable. For beginners, use size MEDIUM
for everyone. This avoids competition amongst students. These are not easily shared. Have one kistka per person. For variety and/or those with fine motor skills or who are very
detail-oriented, get 1 or 2 different sizes for people to try out:
|
They come in different sizes:
- size MEDIUM (recommended)
- size FINE
- size HEAVY
- size EXTRA-FINE
|
|
 Pysanky
Dyes - Dyes last a long time and will make many, many pysanky. Keep in mind that every colour requires its own jar. The more jars of dye you have available, the faster
your activity will go. See Color Chart here Pysanky
Dyes - Dyes last a long time and will make many, many pysanky. Keep in mind that every colour requires its own jar. The more jars of dye you have available, the faster
your activity will go. See Color Chart here |
|
Did you know that:
- if stored properly, they will last from year to year?
- using jars with tight fitting lids will avoid evaporation?
- every couple of weeks adding 1 tablespoon white vinegar to dyes will rejuvenate their dyeing power?
I have suggested color combinations and dye quantity for 3 scenarios below.
|
| |
 Candles
- I recommend using one candle per person. For safety, convenience, and ease of technique, these are not easily shared. Tea candles
aren't the best choice because their flame is too small. Nor are dollar store candles because they burn very quickly. Candles from Baba's Beeswax provide 6 hours of burning
time. Use a sturdy candleholder with a low centre of gravity. Candles
- I recommend using one candle per person. For safety, convenience, and ease of technique, these are not easily shared. Tea candles
aren't the best choice because their flame is too small. Nor are dollar store candles because they burn very quickly. Candles from Baba's Beeswax provide 6 hours of burning
time. Use a sturdy candleholder with a low centre of gravity. |
| |
Teaching Aids
 Pysanky
Workshop Visual Aids - six placards printed on cardstock and ready to laminate will will enhance your learning environment Pysanky
Workshop Visual Aids - six placards printed on cardstock and ready to laminate will will enhance your learning environment
|
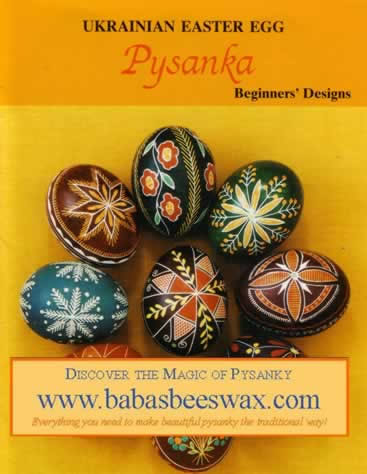
 Ukrainian
Easter Egg Pysanka Beginners' Designs – contains colored diagrams, helpful hints, important information and more than 45 sample designs Ukrainian
Easter Egg Pysanka Beginners' Designs – contains colored diagrams, helpful hints, important information and more than 45 sample designs |
|
 Pysanky on Paper : An Activity Book for Children – contains symbolism, coloring, drawing, reading, writing, math and science through
Pysanky; activities include stories, puzzles and games. Includes bibliographical references
Pysanky on Paper : An Activity Book for Children – contains symbolism, coloring, drawing, reading, writing, math and science through
Pysanky; activities include stories, puzzles and games. Includes bibliographical references
|
 eBook
Pysanky 4 Fun : A Collection of Trilingual Activities 4 Kids - trilingual activity sheets in English, French and Ukrainian in one compact publication eBook
Pysanky 4 Fun : A Collection of Trilingual Activities 4 Kids - trilingual activity sheets in English, French and Ukrainian in one compact publication |
|
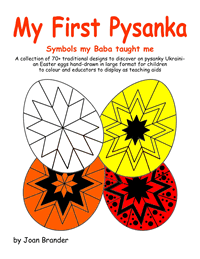
 My
First Pysanka : Symbols my Baba Taught Me – More than just another colouring page. A first of-its-kind book demystifies the symbolism of pysanky with a rich
array of large-format drawings. These can be coloured by children or mounted in classrooms as teaching aids. My
First Pysanka : Symbols my Baba Taught Me – More than just another colouring page. A first of-its-kind book demystifies the symbolism of pysanky with a rich
array of large-format drawings. These can be coloured by children or mounted in classrooms as teaching aids.
|
 Laminated
Pysanky Color Sequence Chart – useful guide provides a hand refrence chart for the 17 colors palette, including how to use "orange wash" Laminated
Pysanky Color Sequence Chart – useful guide provides a hand refrence chart for the 17 colors palette, including how to use "orange wash" |
 Pysanka
Certificates – commemorate the unique skills learned by your students with colour certificates with place for student name, teacher signature and date, describes
the technique, tools used, how to protect and display, a legend of pysanky and more Pysanka
Certificates – commemorate the unique skills learned by your students with colour certificates with place for student name, teacher signature and date, describes
the technique, tools used, how to protect and display, a legend of pysanky and more |
|
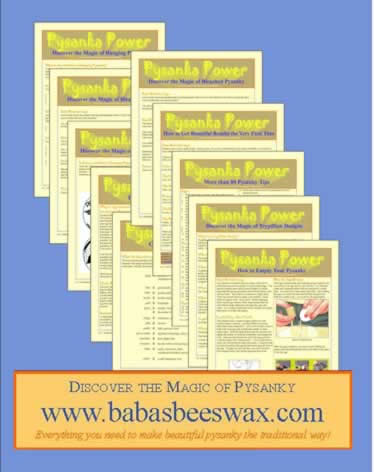
 Pysanka
Power Pamphlets – more information, hints and money-saving tips from the following Pysanka Power Pamphlets. These will be especially useful: Pysanka
Power Pamphlets – more information, hints and money-saving tips from the following Pysanka Power Pamphlets. These will be especially useful:
- Pysanka Power #8 - Colors and Their Meanings
- Pysanka Power #10 - How to Empty Your Pysanky
- Pysanka Power #12 - More than 80 Pysanky Tips
|
|
 Free Online Teacher Guide – select this link for more information
 |
 Pysanka Power Podcast
– learn more here Pysanka Power Podcast
– learn more here |
| Schools can be invoiced with purchase order. |
 |
|
Dye Quantity
|
|
You can use as few as only 2 or 3 colours to get beautiful results! You will never use all 19 of the available colors on one pysanka! I recommend using no more than
5 colours on one pysanka. There are 5 colour ranges (listed here in order of use).
- Colour range 1: yellow or gold
- Colour range 2: accent colours of light green, light blue, or turquoise (*these can be applied with a q-tip as indicated
in instruction pamphlet—therefore fewer of these colours need to be ordered. Follow this with orange, as the orange has a unique property in that it can
wash out these accent colours.)
- Colour range 3: orange
- Colour range 4: red, pink, scarlet, pumpkin, or brick
- Colour range 5: black, purple, royal blue, brown, dark green, or dark red
Over time you'll learn what works for you. In the meantime, here are 4 popular scenarios using the most popular colours, and offering the best results.
Scenario #1 - using 4 colours as in free Online Teacher Guide video
- each student has his/her own Student Kit containing everything required (i.e. beeswax, kistka, dyes) and
can make pysanky at home using our free online video
Scenario #2 - using 5 colours
- have 6 groups with 4 students in each group (6 x 4 = 24 students)
- each group uses 5 colours (1 from each colour range)
- total dyes to order for scenario #1:
- 6 yellow
- 1 green (*see above)
- 6 orange
- 6 red
- 6 black
- total 25 dyes
Scenario #3 - using 5 colours with larger groups (activity will be slower)
- have 5 groups with 5 students in each group (5 x 5 - 1 = 24 students)
- each group uses 5 colours, 1 from each colour range
- total dyes to order for scenario #2:
- 5 yellow
- 1 green (*see above)
- 5 orange
- 5 red
- 5 black
-
total 21 dyes
Scenario #4 - using 3 colours reduces cost and time to complete (and can easily offer more colour variety as indicated)
- have fewer colour choices per group (i.e 3 colours instead of 5)
- and have 5 groups with 5 students in each group (5 x 5 - 1 = 24 students)
- everyone starts with yellow for best results
- Group 1 (yellow, orange, red)
- Group 2 (yellow, pink, black)
- Group 3 (yellow, orange, purple)
- Group 4 (yellow, pink, royal blue)
- Group 5 (yellow, red, black)
- total dyes to order for scenario #4:
- 5 yellow
- 2 orange
- 2 red, 2 pink
- 2 black, 1 purple, 1 royal blue
- total 15 dyes
|
|
| |
|
Entire School
|
|
Make pysanky for just over a dollar! To find out how, ask yourself these questions
Q1. How many students are there in my school?
Q2. What is my comfort zone for the number of people in the classroom writing pysanky all at the same time?
I say 5 is definitely manageable, 10 sounds reasonable for a novice teacher, and 20 is feasible with gained experience or with help from others.
Q3. Is time of the essence?
The more sessions/classrooms you require for the Entire School, the longer it will take.
Q4. What is the best way to conduct the sessions?
I recommend dividing up your classroom into Groups of between 4 and 6 students.
Q5. What Basic Supplies do I need?
Each group of 5 students will share the beeswax and dyes. Over time, the beeswax will have to be replenished (i.e. one block is enough to make about a dozen pysanky).
Although dyes can be re-used every year, some teachers replace them yearly for a nominal cost.
Q6. Under a dollar?
Yes—and this is for your initial investment! Over time, the cost per person goes down even more as you re-use the supplies over and over.
Q7. What are some other money-saving tips?
See Money and Time $aving Tips below
|
|
|
Money and Time $aving Tips
|
|
As you can see, the possibilities are endless. With over 35 years of experience teaching in the classroom, I'm happy to share my knowledge with you, and make recommendations
and suggestions to help you implement a smooth-running activity. Here are some tips:
|
- Reduce costs further by doing half a class at a time (if time permits)
- The basic supplies can be re-used from year to year and will last indefinitely if used and stored properly
- After your initial investment, the cost for the activity decreases over time
- Start with the minimum of supplies, and increase incrementally as your budget allows
- For best results start with yellow, use orange after green/blue/turquoise. Substitute colours in their own colour range. Each dye requires its own jar.
Consider your time limit. The fewer dyes, the longer it takes for everyone to get through them
- Once you've decided to proceed contact me to:
- make recommendations for what supplies you should purchase based on your budget
- make recommendations based on length of time available or on number of pysanky per person being made
- suggest time-saving preparation tips
- recommend common items to be collected from home or school
- give you guidelines for smooth implementation of this activity
I hope this information helps. Let me know. [email protected]
|
|
|
|
|
|
